M5Stack: Documentation and Links
Feel free to edit this page!
General Documentation
- Official M5Stack documentation (including pinouts, schematics)
Programming Languages and IDEs
The M5Stack modules are built around the popular ESP32 microcontroller. They can be programmed in C++ using either the Arduino ecosystem (Arduino IDE) or Platform.io (VScode IDE) (or both in parallel). Alternatively, you can run a MicroPython interpreter on the M5Stack. MicroPython is also used as foundation for M5Stack's custom block-based visual programming framework UIFlow.
C++ (Arduino, Platform.io)
Installation (Arduino IDE)
- Install the Arduino IDE.
Installation (PlatformIO / VSCode)
- Install PlatformIO with VSCode (advanced users may just install the CLI version).
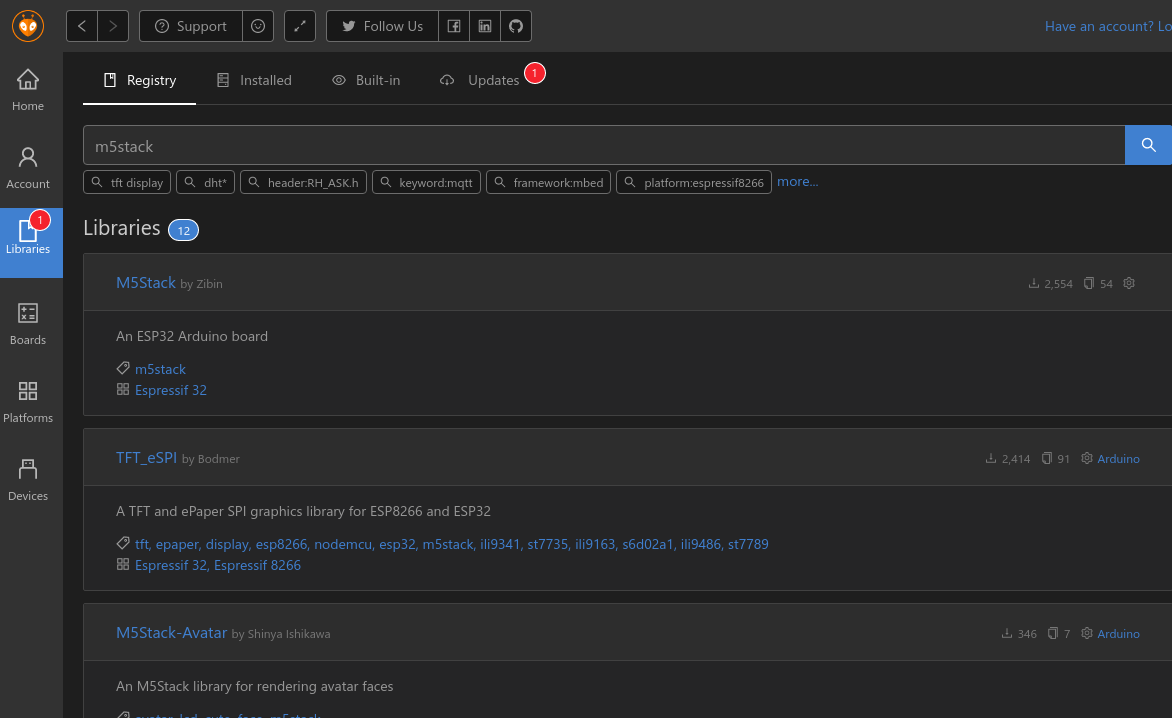
- Add the ESP32 platform in the PlatformIO pane (screenshot).
- Add the M5Stack library in the PlatformIO pane (screenshot)).
- Add Arduino/C++ extensions in the Extensions pane.
- (PlatformIO documentation for M5Stack Basic/Gray and M5Stack Fire)
Hint: If you want to work on a project both using PlatformIO/VScode and the Arduino IDE, just use a main.cpp file that contains #include <Arduino.h> and setup()/loop functions. Then add an empty foobar.ino file into the project folder. The Arduino IDE accepts the .inofile and simply compiles it together with all .cpp files in the same folder (i.e., our main.cpp) into a binary.
Useful Libraries
- M5ez, a complete interface builder system for the M5Stack as an Arduino library.
- M5-Stack-Examples, some useful code snippets we compiled for uncomplicated access to M5Stack's sensors, WLAN hotspot hosting, etc.
- M5Stack-SD-Updater, a framework for loading different firmwares from the SD card into internal flash. Requires that a small code snippet is added to an application's
setup()function.
MicroPython
- Download the current firmware
- Install esptool.
pip3 install esptoolThis is the commandline tool which will be used for flashing. Both Python 2 and Python 3 versions should be ok. - Connect the M5Stack to your computer if not already done.
- Erase the flash.
python3 -m esptool --baud 115200 --after no_reset erase_flash - Flash the firmware.
python3 -m esptool --baud 115200 write_flash --flash_mode dio --flash_freq 80m --flash_size detect 0x1000 m5stack-psram-20180516-v0.4.0.bin - Install ampy.
pip3 install adafruit-ampy - Write your own python code to main.py or download an example.
- Upload your code with ampy.
ampy --port /dev/cu.SLAB_USBtoUART put main.py main.py - Restart the M5Stack.
source: https://appelsiini.net/2018/m5stack-esp32-firmware-cli/
See also: Alternative MicroPython firmware, M5Stack forum post: "Where to get basic (offline?) MicroPython firmware with lcd module support?"
UIFlow
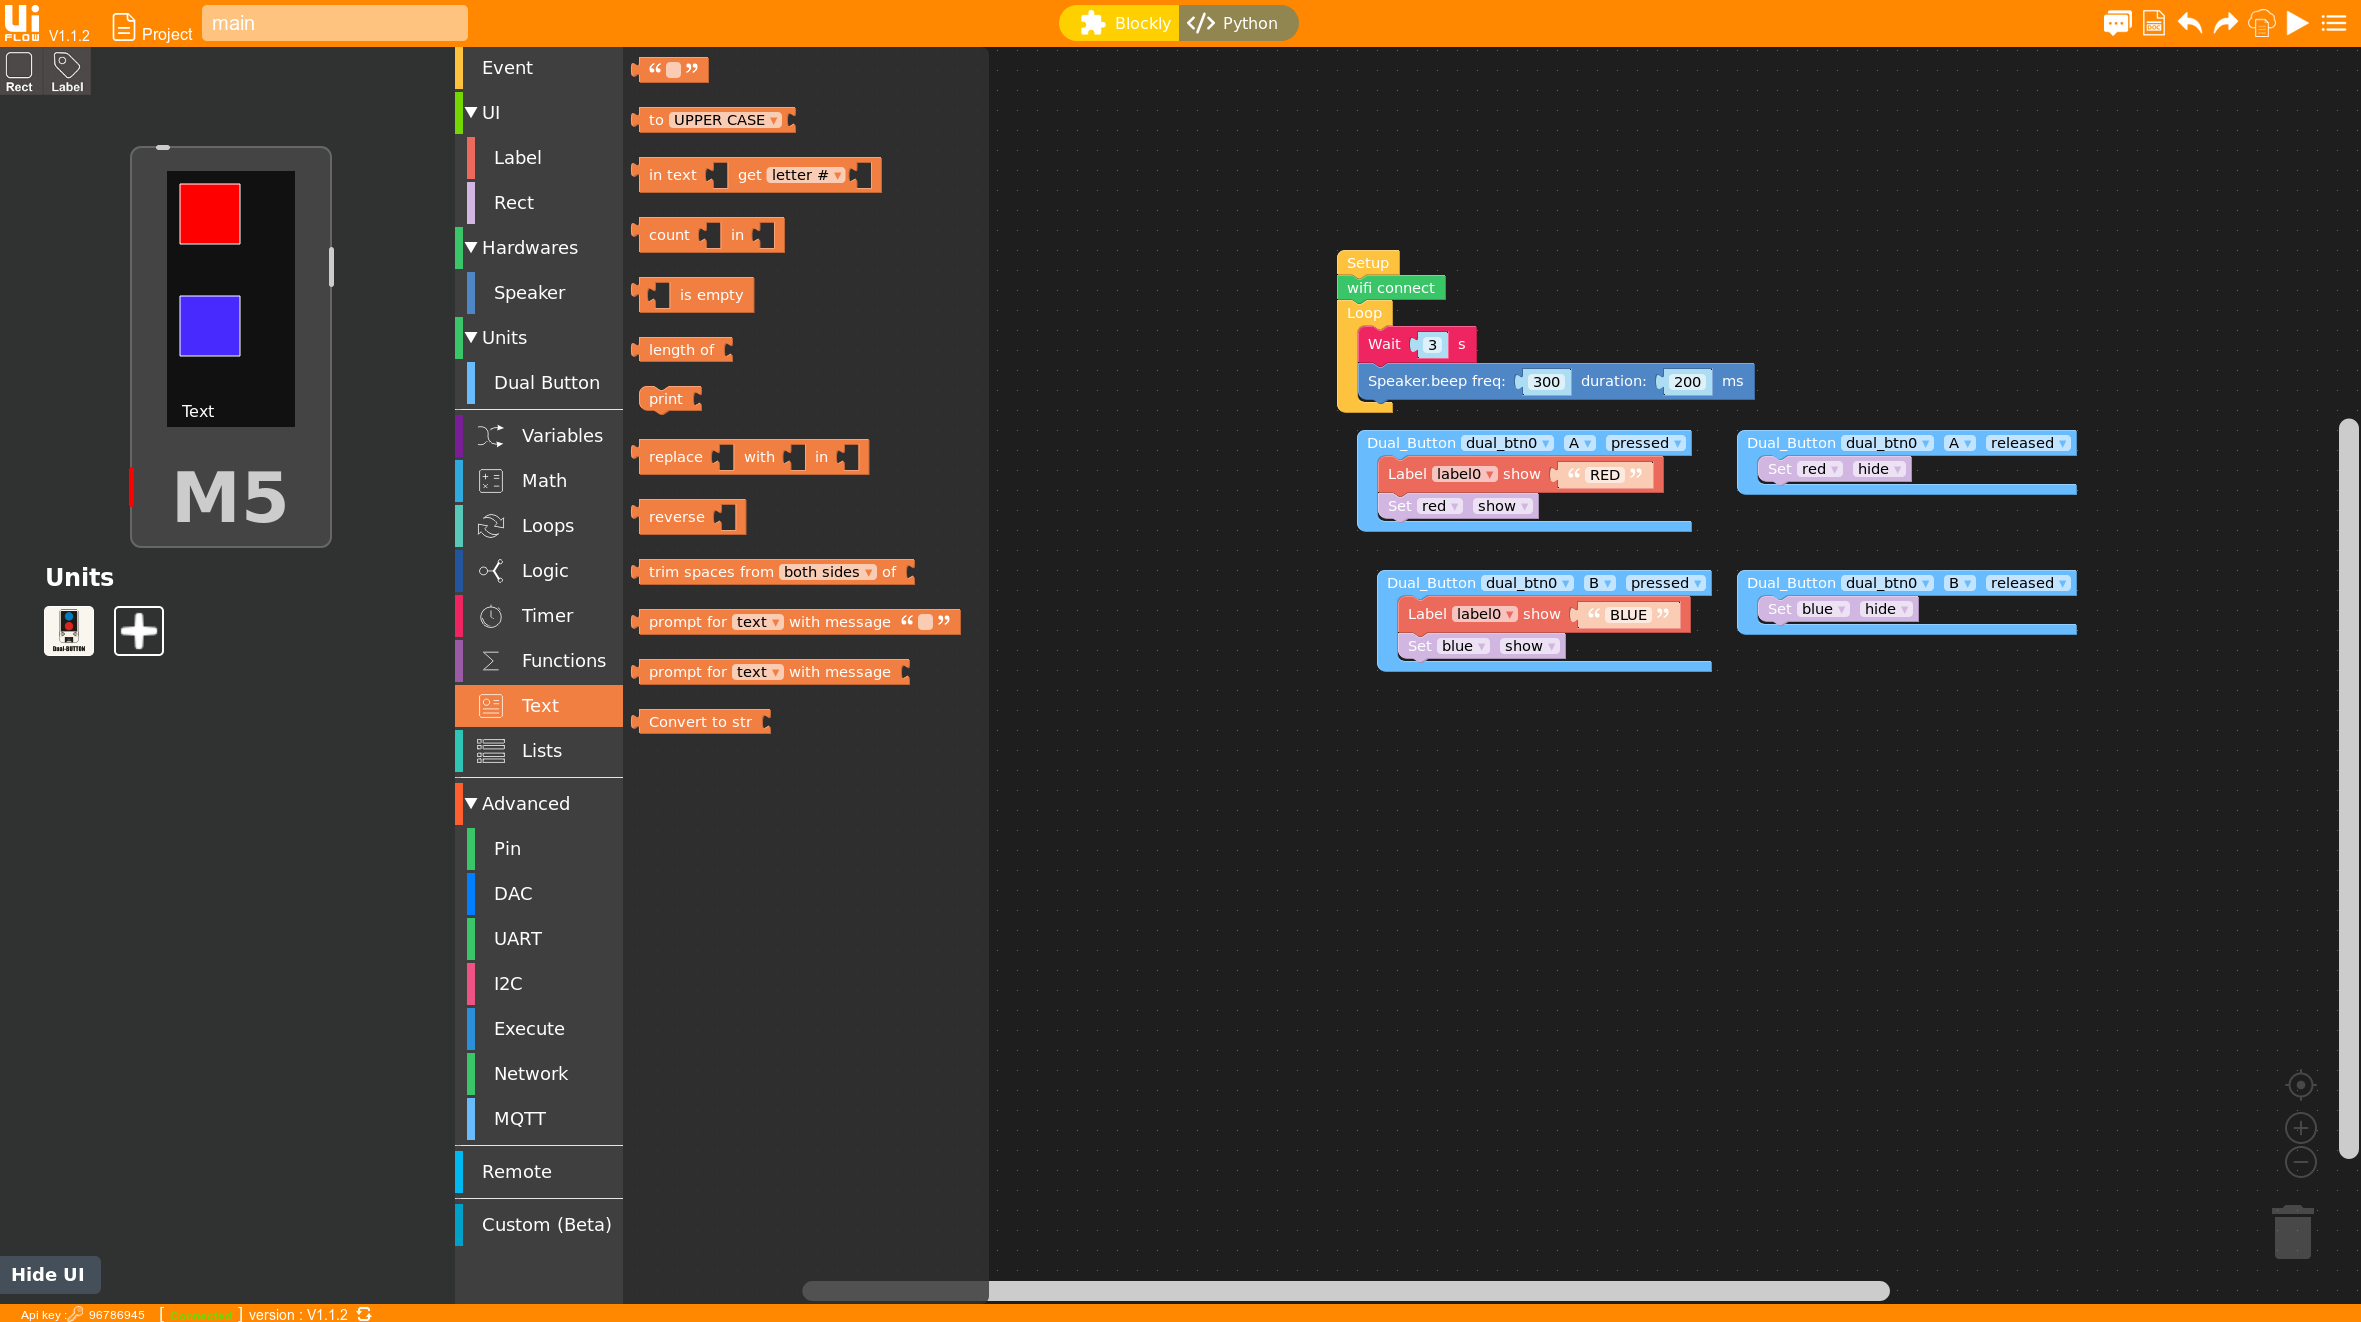
UIFlow/M5Flow is a web-based IDE including a block-based programming language (based on Blockly) that is “compiled” to Python code and uploaded to an M5Stack module via the internet. There is an additional tool, M5BlockMaker, that can be used to develop custom blocks.
Setting up Wifi / connecting to the device
- on first boot:
- press button labeled “Setup” (on the right) and select “Change WIFI Connection”.
- connect your computer to the new Wifi network that the M5Stack created and go to
http://192.168.4.1 - choose one of the available Wifi networks and enter the password (= preshared key / PSK)
- reset the M5Stack (if it doesn't do it by itself) and connect you computer to the internet again
* go to http://flow.m5stack.com, enter the API key displayed on the M5Stack in order to connect it to the web IDE, and select the correct device (core/stick).
- on the left side of the IDE, add the UI elements and units (= pluggable hardware modules) you want to use
- these items and their events/properties then become available in the library in the middle of the IDE
- drag blocks from the library onto the canvas on the right hand side in order to build a program.
UIFlow requires a special firmware to be flashed onto the M5Stack module (Howto).
If you don't want to install the flashing tools, you can always ask us to re-flash the UIFlow firmware onto the M5Stack module.
Shops
- AliExpress (M5Stack's main store)
- there is an official reseller on Amazon
Random Stuff and Known Issues
- Disabling the annoying hissing sound from the speaker (soldering one wire from GPIO5 to pin 1 of the amplifier IC)
- After a medium number of connect/disconnect cycles, the internal shield connector may make bad contact, especially the battery pins. There is not really a solution for this problem.
- Flashing the UIflow firmware using esptool 2.5 (the most recent version available in Debian) results in a non-working system. Use esptool 2.6.
Interesting Projects
- StickWatch - a DIY smart watch based on M5Stick
- nixietubeM5 - (Fake) Nixie Tube Display on a M5Stack
- M5tube - video player for M5Stack with Docker conversion support