Project: Sketching with Hardware
A Course for Teaching Interactive Hardware Prototyping to Computer Science Students
Status: ongoing
Runtime: 2012 -
Participants: Andreas Schmid, Raphael Wimmer, Laurin Muth, Felix Riedl, Thomas Fischer
Keywords: tangible interaction, teaching, prototyping
Summary (What is SWH?)
Sketching with Hardware is an undergraduate university course with the goal to teach students how to build prototypes for tangible user interfaces. It is part of the media informatics curriculum at the University of Regensburg as an elective course. Goals of this course are to create awareness for tangible interaction among students and prepare them to implement advanced projects like bachelor’s and master’s theses in this field.
Course History
The course concept for Sketching with Hardware was developed by Alexander Wiethoff and Raphael Wimmer who combined a course concept targeted at interaction designers with one targeted at computer science students at LMU Munich in 2009, where the course has been taught ever since.
Wimmer started teaching the course from 2012 onwards together with Florian Echtler at University of Regensburg with Andreas Schmid joining in 2015.
Course content and structure
Sketching with Hardware is structured as a two week full time block. During the first week, students are taught essential skills needed to work on hardware projects, like electronics basics, soldering, serial communication and low-level programming with the Arduino. During the second week, groups of two students each are formed and they build a tangible prototype together as their assignment for the course. The topic of this final project is developed in an iterative process and follows a general theme of the course.
Following, a detailed overview over the course's content is shown. Depending on the size of the course and the participant's previous knowledge, the time needed for exercises may vary strongly. Make sure to provide additional supervision to weaker groups during the first week to let them catch up with more experienced peers. After each exercise sheet, the results should be presented and discussed shortly. All practical tasks of the course are done in groups of two. During the first week, we randomize those groups each day so participants get to know each other.

Before the Course
As Sketching with Hardware is a very practical course which requires participants to build hardware prototypes by crafting and soldering, there are some preparations to do before the actual course starts.
We recommend a group size of ten to twelve participants (forming groups of two) and two supervisors (one lecturer, one student assistant). This has worked for us in the past, as resources like available tools and space in the lab are used at maximum capacity and supervisors can still keep a good overview on participant's progress and individual problems.
As interest in Sketching with Hardware is generally high, students need to apply for a slot in the course by handing in a short motivational letter (about one page). In this letter, applicants specify how much experience they have in electronics, prototyping and programming, what caught their interest in the course and argue why we should accept them in general. This procedure ensures that only intrinsically motivated students participate in the course.
Tools, electrical components and some material to build prototypes (cardboard, wood, plastic, screws, …) and material for each group have to be acquired before the course. Also, the lab/classroom should be reserved well before the course starts as it is needed continuously for two weeks. Details about the needed material and requirements for the room can be found below.
Day 1
The first day starts out with an introduction of the course's content, structure and procedure. Also, supervisors and participants introduce themselves briefly to get to know each other as a personal and informal atmosphere is desirable regarding the small size of the group and the numerous tasks that require working together. Basic concepts of tangible interaction and electronics are conveyed with a combination of lectures and exercises and soldering is taught in a hands-on way.
During the first day, it is especially important to make sure everyone understands the material as the basics of electronics and soldering are required during the whole duration of the course. Additionally, soldering should be explained thoroughly before participants start the soldering exercise so nobody gets hurt.

Day 2
The second day of the course is focused on getting to know the Arduino platform. Participants shoud have installed the Arduino IDE beforehand so no time gets lost for downloading and installing the software. The first exercises are based on sample programs and components participants already know from the previous day so they can get comfortable with the Arduino.
We use the Arduino Micro for Sketching with Hardware as it supports the emulation of HID devices. Thus, it is rather simple to build a custom input device using the Arduino Micro. This exercise is a foundation for more extensive projects later in the course as the complete process from having an idea, finding the right components, writing a small programm and connecting it all together is needed. After this exercise, each group presents their device and discusses the problems which occured while building it.
A short lecture about the differences between the programming languages participants are used to and programming the Arduino prepares participants for the next exercise. Each group builds a binary clock with eight LEDs, a shift register and the Arduino. This exercise requires reading and understanding the data sheet for the shift register and translating it into an advanced circuit on the breadboard.

Day 3
During the third day of Sketching with Hardware, the contents of the first two days are complemented with deeper and more advanced topics. Those topics include installing and using libraries with the Arduino IDE, as well as an introduction of serial protocols which can be used to control more complex components.
As an exercise, each group of participants gets two components, one sensor and one actor, which they have to combine with the Arduino. Possible components for this exercise include displays (LCD, OLED, LED matrix), motors (DC motors, stepping motors, servo motors), audio modules and all kinds of sensors (humidity, light, distance, microphones). Depending on the complexity of the components and the knowledge of the participants, the duration of this exercise can vary vastly.
At the end of the third day, ask participants about topics that are still unclear so they can be repeated now or on the next day (depending on the participant's motivation).
Day 4
The fourth day of the course starts with a flexible slot which should be used to convey material specific to the theme of the final project (which is revealed later). After that, there should be time to summarize and repeat topics that are still unclear to participants.
After a lunch break, a short lecture on interaction design, affordances and tangible interaction serves to shift the participant's focus from a rather technical point of view towards a more creative mindset. Then some pictures and videos of projects related to the theme of the final project are shown. The theme is revealed afterwards; it should be rather abstract so there is room for interpretation, but there should be some strict requirements (restriction breeds creativity!).
Some examples for themes we have used in past course iterations are:
- Everyday objects with unexpected behavior
- “Magic Touch”
- Tangible games
- Objects that could be part of the “Harry Potter” universe
- “Spooky Interaction at a Distance”
- Tangible Audio
Participants form groups of two for their final projects. Each group creates a poster with at least three ideas for the project which follow the theme revealed earlier. Technical aspects of those ideas are not relevant at this stage of the project, so make sure nobody approaches this task from a technical point of view. This session has a strict time limit of 45 minutes so participants are in a hurry and do not overthink their ideas.
When the time is up, the feedback session starts. Each group gets a spot inside the room where they can present their poster created in the previous session. While one member stays at the poster and explains the ideas to others, the other member visits the other group's posters, asks questions and marks their preferred idea by drawing a symbol on their poster. Afterwards, partners switch roles so every course participant has seen each idea.
As soon as the feedback session is over, each group discusses their ideas and the feedback by their peers and decide which idea to realize as their final project. The rest of the day can be used to flesh out the idea, determine features and ask technical questions.


Day 5
As the theoretical part of the course is concluded, it is now time to communicate the procedure of the practical part. Participants can now freely work on their projects and supervisors are there to help solving problems. Opening times of the lab as well as fixed dates for bulk orders or a trip to the hardware store should be communicated at this point as well.
Lastly, the evaluation scheme of the course is presented so participants know which aspects of the final project to focus on.
During a lab tour, participants are told where to find tools and material they can use for their final projects. Before using power tools for the first time, they have to ask for an introduction by the supervisor.
For the rest of the day, participants work on prototypes for all features of their final project, define milestones, distribute tasks and create a list of needed components. This original planning phase is important as the time for the final project is restricted to only one week. Also, having a plan B for critical features is desireable in case something goes wrong (and things will go wrong!).
Over the weekend, each group has to create a short (1 minute) video with a low fidelity prototype of their project. Technical details should be omitted from the video and especially interaction with the prototype should be shown.
Week 2
Start the first day of the second week by showing each concept video to the participants. Let them discuss and provide feedback after each video.
After that, project groups work on their prototypes independently for the whole week. Make sure at least one supervisor is present at any time to answer questions and make sure nobody does dumb things. Normally, participants are very motivated at this point and want to work on their projects as long as possible. To encourage this, supervisors may work in shifts so the lab can remain open longer.
The electical components and building material available in the lab might not be sufficient for each project. Therefore, components should be ordered collectively and as early as possible. Going to a hardware store with some participants is also an option.
The prototypes should be feature complete in the afternoon of the fourth day of the second week. Then, each group presents their prototype to their peers. We recommend inviting colleagues to this presentation so it feels more “official” to the participants.
The last day of the course is dedicated to implementing details, fixing bugs and a final polish of the prototypes. This is also the last day participants are allowed to work on their prototypes.
Participants also have to hand in a project documentation as well as a video showcasing their finished prototype. We recommend to set the deadline for this assignment to about five days after the course.
Conducting the Course
Needed Material and Infrastructure
All required tools, electrical components and building materials, as well as the needed infrastructure, are listed in this section. This includes a box of material needed for the exercises during the first week of the course, (power-) tools for shared use among participants, and material to build prototypes.
Material for Participants
Each group of participants gets a shared box containing all tools and materials necessary to work on exercises during the first week. We intentionally only provide one box to each group to encourage participants to work together.

| Amount | Name | Price per piece | Link (example) |
|---|---|---|---|
| 1 | Cutter | - | - |
| 1 | Soldering Iron | - | - |
| 1 | Soldering Iron Stand | - | - |
| 1 | Soldering Tip Cleaner | - | - |
| 1 | Solder Pump | - | - |
| about 1 m | Solder | - | - |
| 1 | Solder Flux | - | - |
| 1 | Third Hand (optionally with magnifying glass) | - | - |
| 1 | Safety Goggles | - | - |
| 1 | Toolkit | - | - |
| 1 | Multimeter | - | - |
| 1 set | Jumper Wires (male-male, male-female, female-female, about 20 each) | - | - |
| 1 | Arduino Micro + Cable | - | - |
| about 50 | Pin Headers (male and female) | - | - |
| 1 | Servo Motor | - | - |
| 1 | Potentiometer (linear, 10k Ohm) | - | - |
| 1 | 555 Timer IC | - | - |
| 1 | Shift Register (e.g. 74HC595) | - | - |
| 1 | Mosfet | - | - |
| 1 set | Resistors (220 Ohm, 10k Ohm, 10 each) | - | - |
| 1 set | Capacitors (100 pF, 47 uF, 5 each) | - | - |
| 1 set | LEDs (3 colors, 6 each) | - | - |
| about 5 | Buttons and Switches | - | - |
| 1 | Breadboard (at least 10×60 rows, with power supply rails) | - | - |
| 1 | NeoPixel Strip (10 LEDs, e.g. WS2812, with pin headers) | - | - |
| 5 m | Wire | - | - |
| 1 | USB Hub (preferrably active) | - | - |
| 1 | Power Supply (adjustable, 3-9 V) | - | - |
| 1 | Soldering Mat (wood or silicone) | - | - |
| 1 | Magnifying Glass | - | - |
| 1 | Desk Lamp | - | - |
Tools for shared use
Some useful tools that can be shared by all participants. Before students use powertools, they have to get a safety instruction.
| Amount | Name | Price per piece | Link (example) |
|---|---|---|---|
| 1 | Oscilloscope | - | - |
| 2 | Lab Power Supply | - | - |
| 1 | Cordless Screwdriver + Drills | - | - |
| 1 | Jigsaw | - | - |
| 1 | Vacuum Cleaner | - | - |
| 1 | Hot Glue Gun | - | - |
| 1 | Handsaw | - | - |
| 1 set | Screwdrivers | - | - |
| 1 | Measuring Tape | - | - |
| 1 | Wire Cutter | - | - |
| 1 | Pliers | - | - |
| 4 | Clamps | - | - |
Materials and Consumables
A collection of components and material is provided to participants so they can use them for their project and do not have to acquire everything by themselves. Amounts may vary vastly depending on the size of the course and the type of prototypes being built.
| Amount | Name | Price per piece | Link (example) |
|---|---|---|---|
| 30 | Alligator Clips | - | - |
| several rolls | Wire (thin, different colors) | - | - |
| assortment | Screws | - | - |
| some sheets | Plywood | - | - |
| some sheets | Acrylic Glass | - | - |
| 1 roll | Copper Tape | - | - |
| assortment | Metal Fittings | - | - |
| 3 rolls | Duct Tape | - | - |
| several rolls | Electrical Tape | - | - |
| assortment | Shrinking Tube | - | - |
| 1 set | Resistors (50 to 100k Ohm) | - | - |
| 1 set | Capacitors (100 pF to 1 mF) | - | - |
| 20 | Perfboards | - | - |
| 5 m | WS2812 LED Strips (e.g. Adafruit NeoPixel) | - | - |
| assortment | Paint (e.g. Acrylics) | - | - |
| assortment | Sand Paper (80 to 400 grain) | - | - |
| assortment | Cardboard (for paper prototypes, different colors) | - | - |
Room
If available, an electronics lab or workshop should be used, but a normal classroom should be sufficient if there is enough space for all participants, building material and tools. Each group of two needs a table (we use normal classroom tables) and enough power sockets. There should be enough space between the tables so supervisors can move from group to group quickly and comfortably. Possible obstacles should be removed as tripping over can be dangerous when people are soldering, cutting and drilling.
The room is needed for two weeks continuously, so it should be lockable.
For the lectures during the first week of the course, a projector is needed. A whiteboard is also desireable as it can help explaining particular topics.
Supervisors
Two full time supervisors are ideal for a group size of ten to twelve participants in groups of two. The second supervisor can be a student assistant with experience in electronics, crafting and programming. There should alway be at least one supervisor in the room in case of an accident.
Assignments
Hardware Prototype
The main assignment for the course is the hardware prototype built during the second week. It should…
- work
- be innovative
- be feature complete
- follow the theme for the final project
- be robust
- look nice
We do not allow using microcomputers like the Raspberry Pi for the prototype because this would shift the focus away from building hardware towards programming. Also, displays should only be used if absolutely necessary, as the state of the system should be conveyed by the hardware itself.
Documentation
A written documentation of the hardware prototype has to be handed in in addition to the hardware itself. It should be five to ten pages long and include…
- a title page with the project's title, an image and a short description
- a description of the concept
- a description of the interaction with the prototype
- circuit diagrams with exact component names
- a summary of the code
- a guide on how to set up and use the prototype
Concept Video
On the last day of the course's first week, participants have to create a one minute video which showcases their idea for the final prototpye. In this video, the interaction with the prototype has to be shown and technical details have to be avoided.
Participants have creative freedom on how to create this video, as long as the idea is communicated, all features are included and the interaction becomes clear. We allow anything from cardboard prototypes and stop motion videos to 3D renders.
Project Video
As part of the final assignment, a video of the finished prototype has to be handed in. It should show the prototype in a more or less realistic situation, as well as interaction with the prototype. The production quality of this video should be as good as possible. Examples for project videos are linked below.
Media
Slides and exercise sheets
Slides and exercise sheets are available in English and German and in PDF, ODP, or PPTX format:
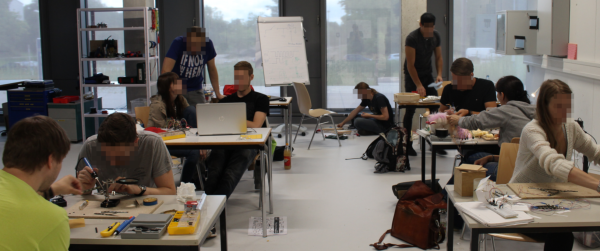
Impressions of former courses
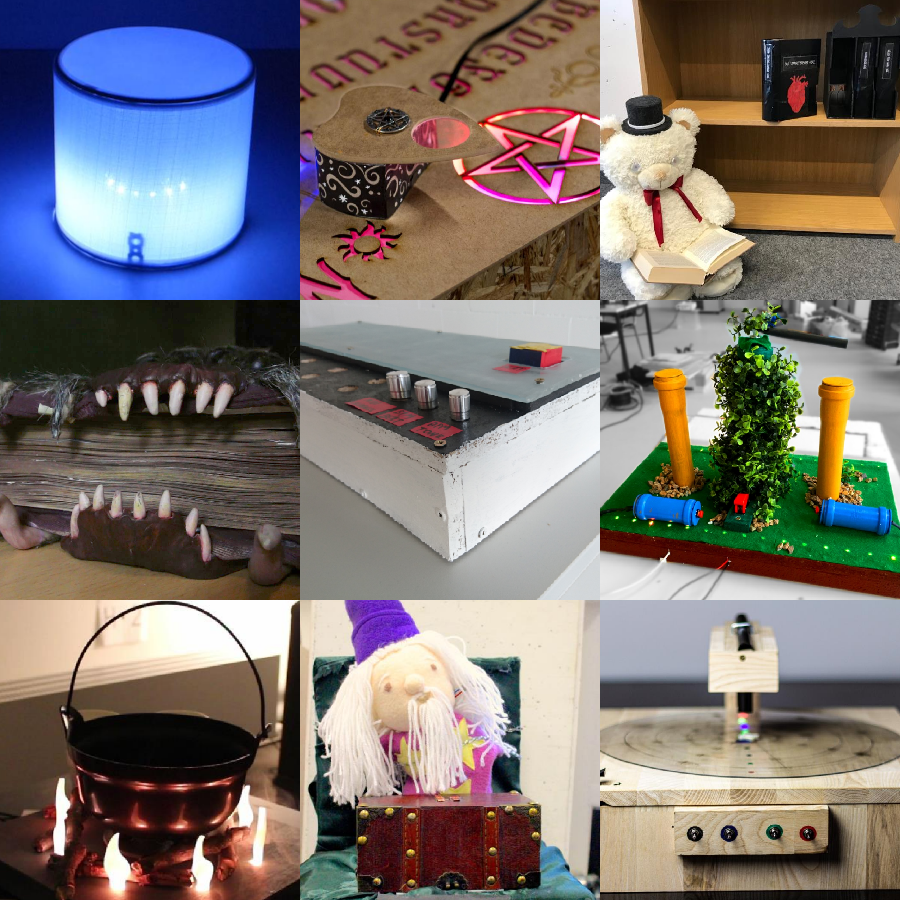
Project videos of former course iterations
TURNado 360 Premium (Stefan Lippl, Christoph Meyer)
RealLifeMusicBox (Alex Odorizzi, Markus Bink)
Der Wahrsager (Victoria Serova, Oscar Rembold)
FeurIO (Chau Duy Quang, Doris Ebenschwanger)
Crazy Speed Maze (Kristine Wolf, Johannes Lorper)
The Monster Book of Monsters (Melanie Kloss, Martina Corinna Bauer)
Ghost Detector (Lam Minh Duc, Andreas F.)
Ouija Board (Laura Zeilbeck, Elisa Valletta)
Witchfight (Raphaela Scherer, Simon Schindlatz)
Voodoo Doll (Florian Gast, Sarah Kurek)
Talking Hat (Jonas Jelinski, Thomas Fischer)
iFreshD (Alexander Kalus, Joshua Benker)
Denkarium (Yannick Hildebrandt, Nils Barthelme)
Unicorn Tamagotchi (Nina Hösl, Christian Winkler)
Hexagon Slider (Daniel Hanke, Dennis Schüsselbauer)
Alchemistry (Laurin Muth, Christoph Härtl)
Smart Mirror (Julia Sageder, Ariana Demleitner)
TUI CD Shelf (Vitus Maierhöfer, Matthias Bräuer)
Publications
Andreas Schmid, Raphael Wimmer
Proceedings of the Mensch und Computer 2019 Workshop "Be-greifbare Interaktion"
Experiences of teaching the course "Sketching with Hardware" (Tweet this with link)
![]()
![]()
Andreas Schmid, Alexander Kalus, Raphael Wimmer
Proceedings of the Mensch und Computer 2023
In the context of a university course on tangible interaction, we explored how material found in the trash could be used as a resource for prototyping interactive artifacts. (Tweet this with link)
![]()
![]()